Importing Events into RotorHazard#
Archiving Previous Events#
Important
All instructions under this subsection will be performed under the Format page

If the panels under this subsection are not visable, verify your timer has an internet connection and reboot the system. For more information, review the section on the plugin’s activation.
Before importing a new event, it is best practice to archive your previous event. To archive
your previous event start by locating the Event panel.
Open up the
Eventpanel and then clickArchive/New Event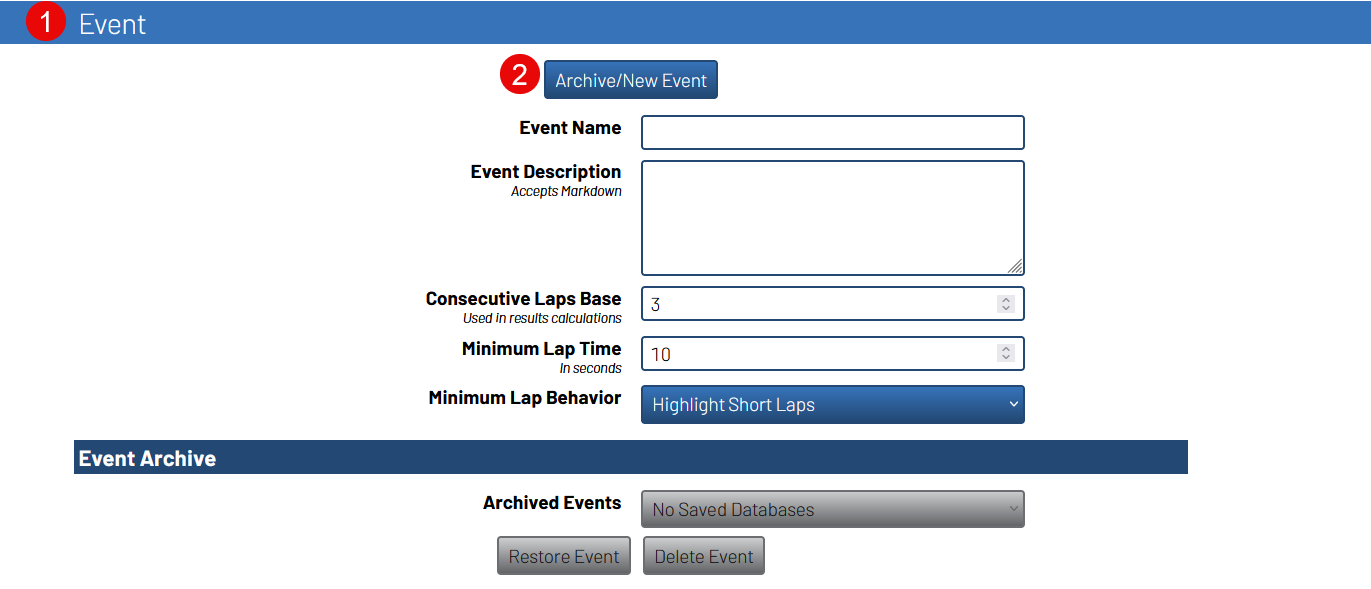
Select
Races, Heats, Classes, and Pilotsfrom the drop-down selector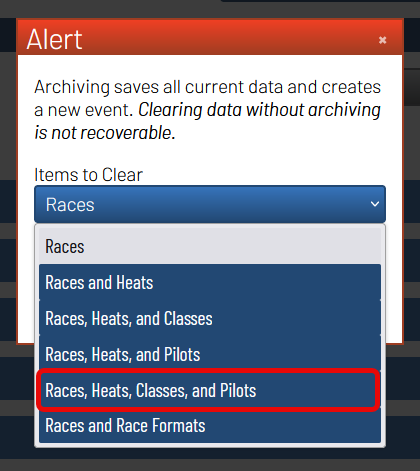
Press
Archive Eventto backup your race data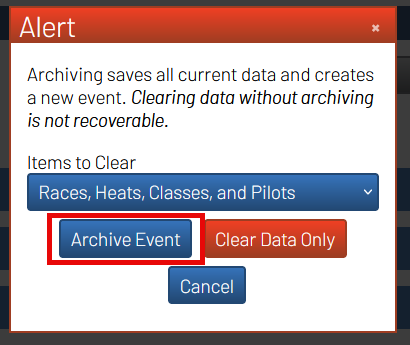
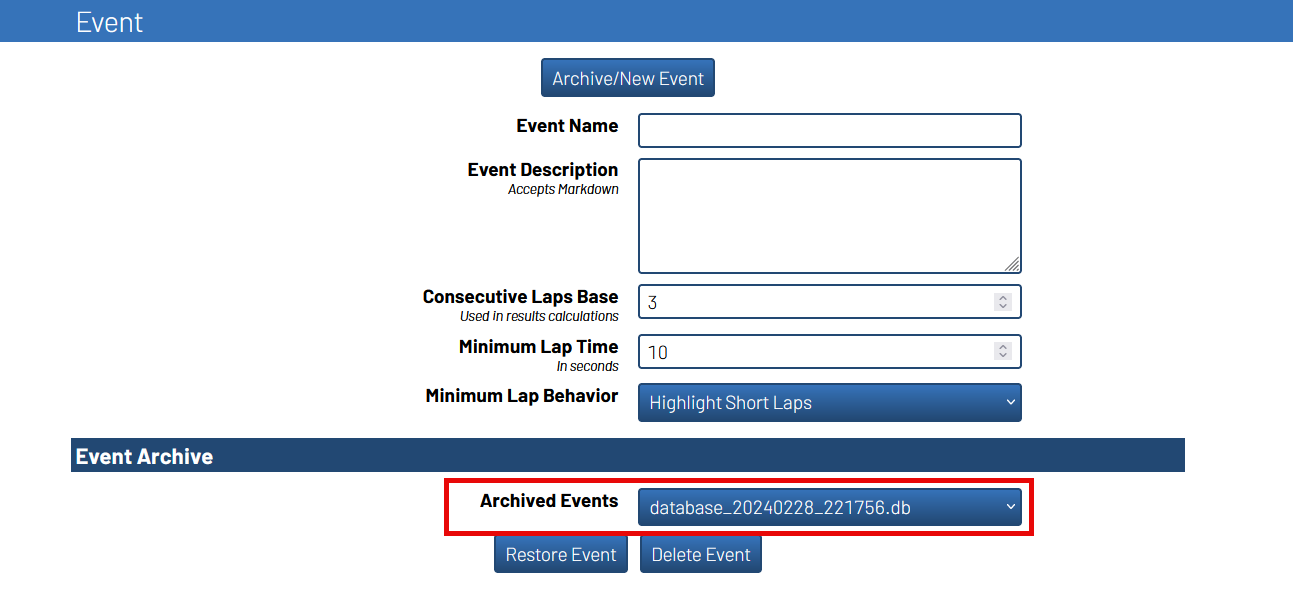
Your previous event can now be seen under the Archived Events menu
Note
The archived event will typically be named after the current Event Name. In the
case that there is already a archived database, the newly archived database will be named
with the system’s date and time it was archived at. If your timer does not have a Real Time
Clock installed, the system’s time may not have access to the correct date and time at the time
of archiving.
Setting Up MultiGP’s Frequency Profile#

The MultiGP frequency profile you can use is determined by the number of nodes within your RotorHazard timer.
MultiGP’s IMD6 profile has 6 slots, therefore in order to use it, your timer must have at least 6 functional nodes.
Likewise, since MultiGP’s Raceband 8 has 8 slots, you must have an 8 (or more) node timer.
Disabling Slots#
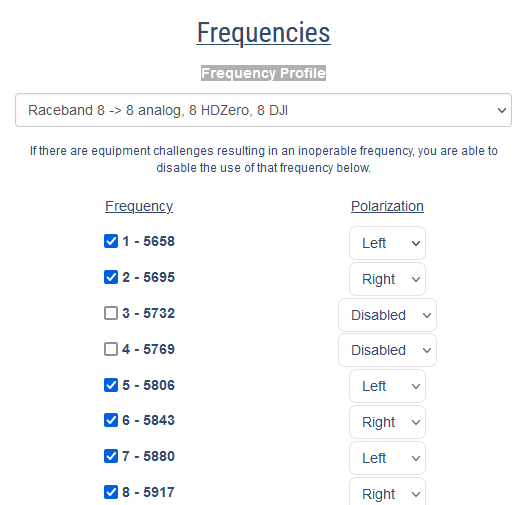
When slots are disabled within a MultiGP frequency profile, they are not removed. For example, when disabling
two slots in MultiGP’s Raceband 8 frequency profile, it is still considered an 8 slot frequency profile.
In the event there have been slots disabled from the MultiGP frequency profile, you are able to disable the equivalent nodes within RotorHazard’s frequency profile.

There are a few advantages to disabling unnecessary nodes such as decluttering the RotorHazard UI and reducing the overall power consumption of the timer.

Importing an Event#
Important
All instructions under this subsection will be performed under the Format page
If the panels under this subsection are not visable, verify your timer has an internet connection and reboot the system. For more information, review the section on the plugin’s activation.
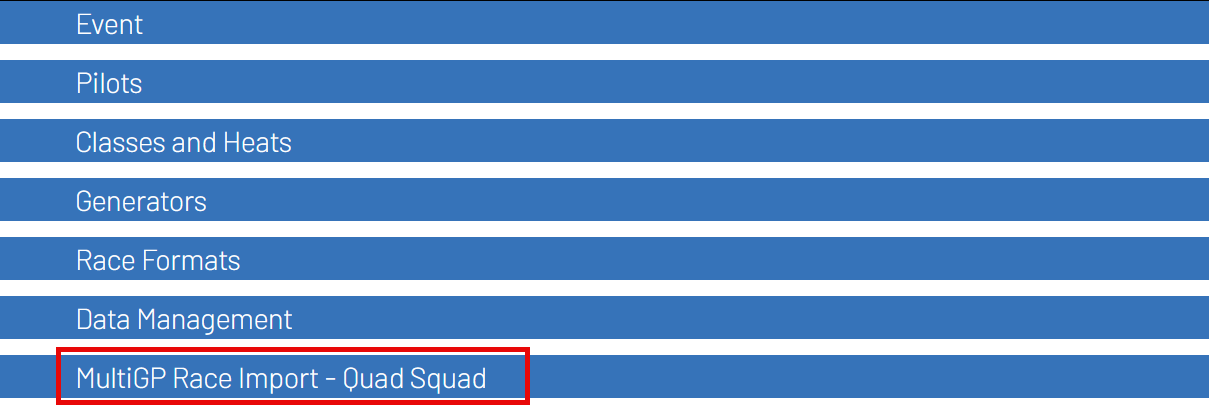
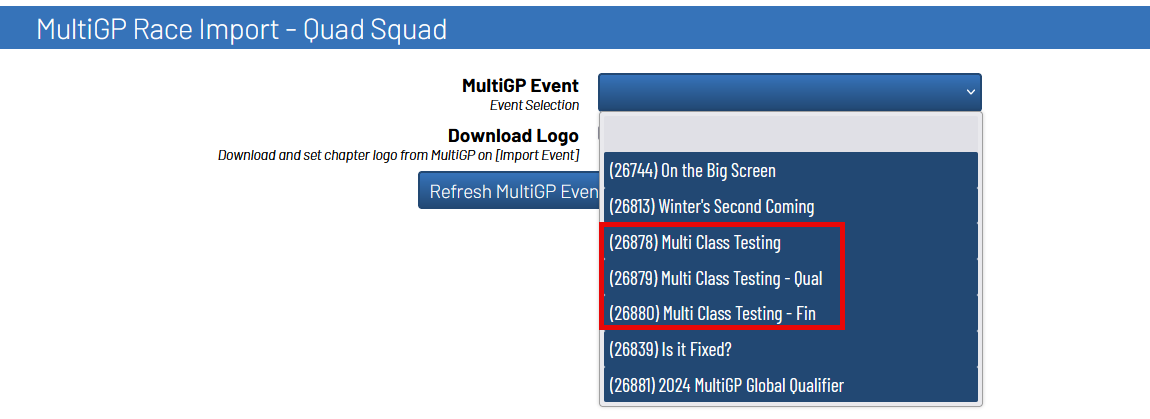
1. Locate the MultiGP Race Import panel. The panel will include the name of the MultiGP chapter
associated with the entered MultiGP API key.
2. Select the race that you would like to import from MultiGP from the drop-down selector
and then click Import Race
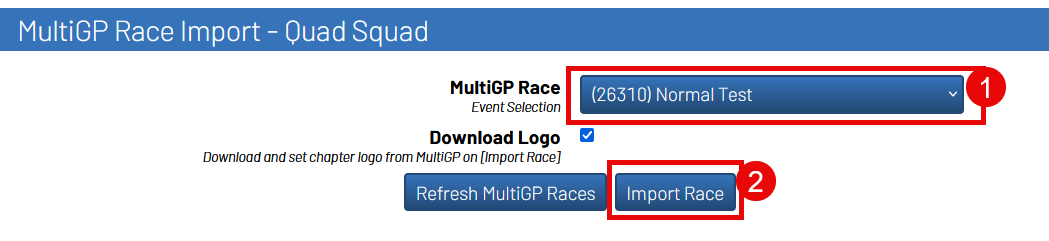
Tip
Turn on Download Logo to download the chapter’s logo to the timer. It will automatically
be added to your timer’s home page.
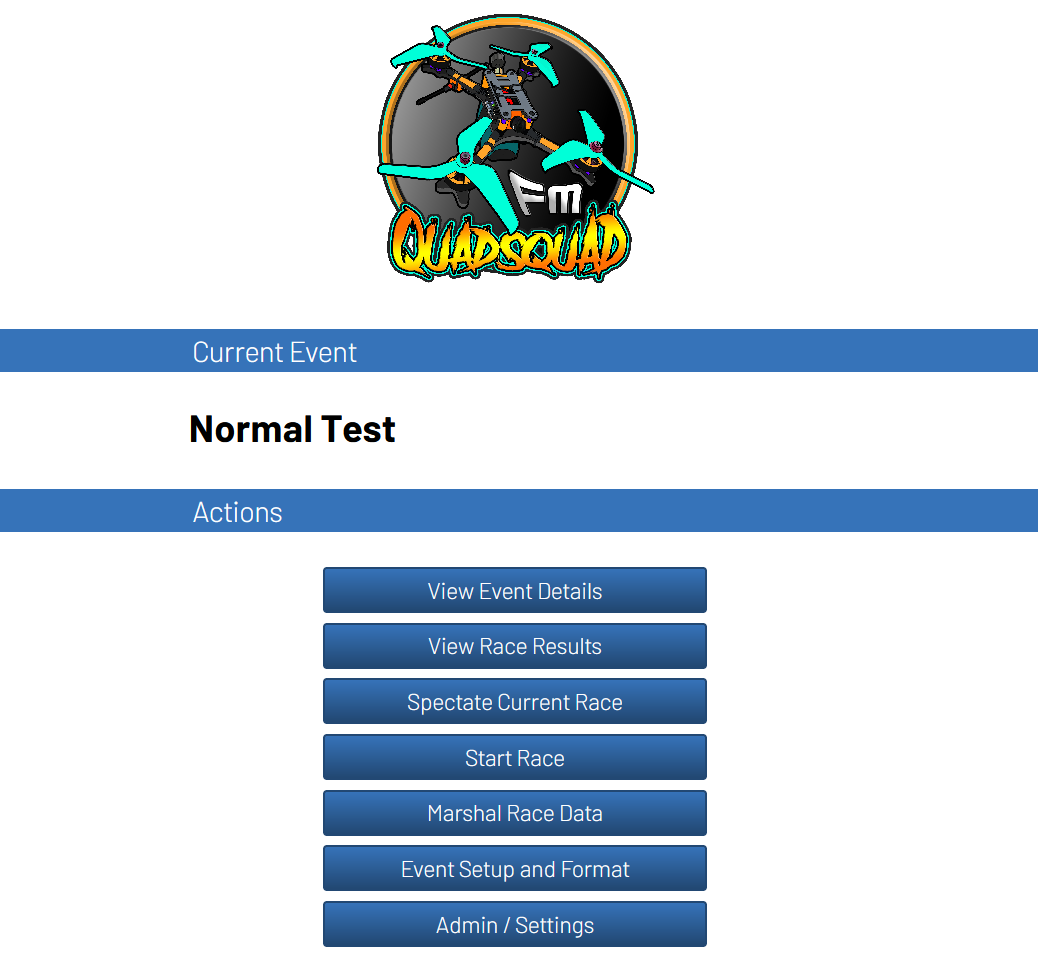
After importing, you should see a few changes made to the RotorHazard user interface. The following table outlines the type of changes that should be shown depending on the type of race that was imported.
Controlled Race |
ZippyQ Race |
|
|---|---|---|
Event Name Change |
Yes |
Yes |
Event Description Change |
Yes |
Yes |
Imported Pilots under the |
Yes |
No |
An imported class under the |
Yes |
Yes |
Heats set up under the newly imported class |
Yes |
No |
A |
Yes |
Yes |
A |
No |
Yes |
A |
Yes |
Yes |
A |
No |
Yes |
Multi-Race Events#
The Toolkit offers support for running multi-race MultiGP events.
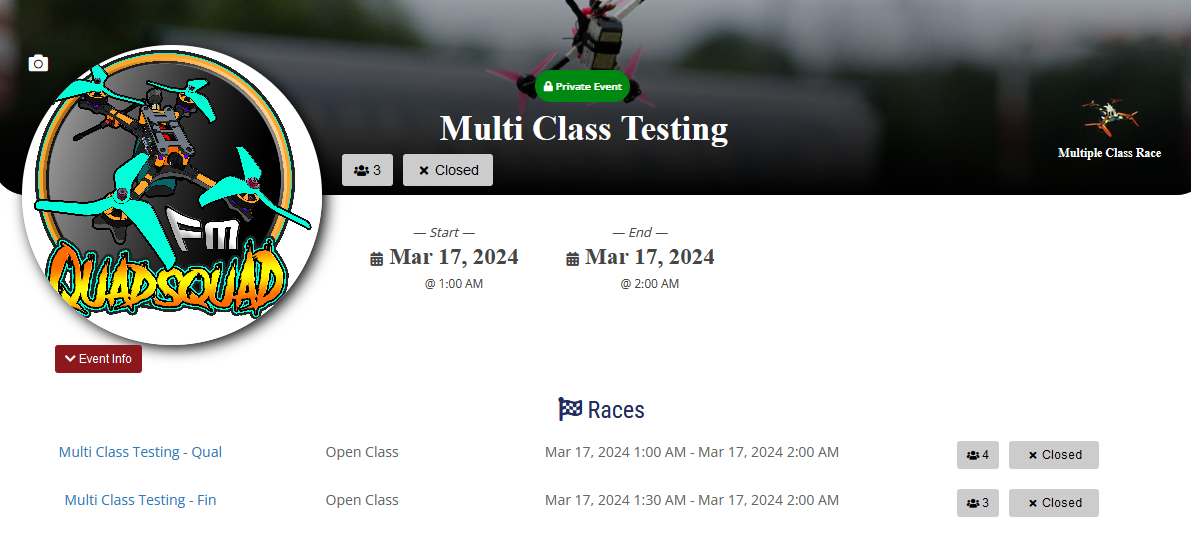
In the example above, Multi Class Testing is the parent event while
Multi Class Testing - Qual and Multi Class Testing - Fin are child
events.
There are two avaliable approach for fully completing the Multi Class Testing
event with the MultiGP Toolkit.
1. Import and run a child event as you would for a standard MultiGP event. Upon completion of the child event, archive it and import the next child event. Repeat this process until all the child events have been completed.
2. Import the parent event. The Toolkit will setup a seperate class within RotorHazard for each child event. It will also setup the ability to individually push your race data and results to each child event. This is the recommended approach when running a multi-race event offline.